 They are two days old in these photos and so desperately cute.
Elliot decided that the one with black feet should be called Dudley and Ria named the one with the lighter feet Duncan - although they are more than likely to be girls!
 The ducklings are growing so fast it is incredible. Here they are at almost two weeks old now. I love the shape of Runner ducks.

Here is a photo of Bonnies turkey who is incredibly comical.

In the miniatures department I have been making more furniture for Cricket Hollow. Here is the Store cabinet, as I mentioned before this is the Liberty Bay series from the Betterleys.
 Also from the same series here is the table ....
 .....and chairs.
 My kit for Acorn Cottage arrived as well. This is a workshop that was offered on the Quarter Connection group. It is designed by Jill Castoral and is lovely. I wanted to do this workshop kit as it has techniques using paper clay. I have always been rather scared to use clay and in this particular kit you need to sculpt trees to hug around the house so it is going to be a serious challenge.
 I started by building the main part of the house. The first thing that struck me was how petite it was for a 48th scale miniature. It is looking like it is going to very cute.

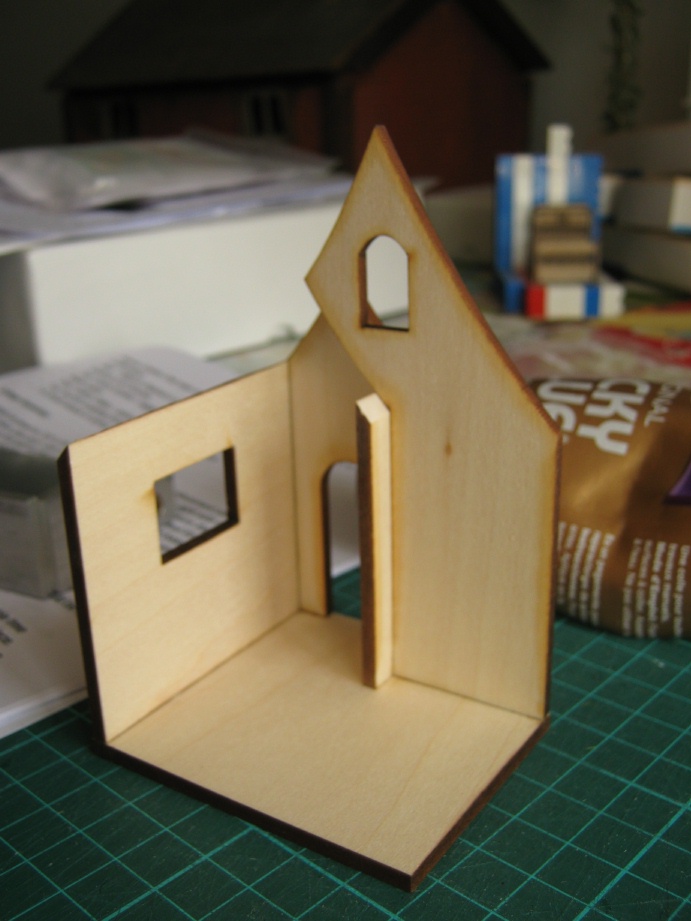


 It went together beautifully. Then I started to cut away at the foam base to get the right shape.
 The chimney is moulded out of resin and just had to painted. I initially painted it in various shades of grey.
 It lacked depth so I added some beige highlights.
 All the pieces in the kits are extremely well labelled and the instructions are detailed and easy to follow thankfully!
 The window frames are all different shapes and perfectly cut to size.
 Here is the interior. I painted it several shades of cream and then used Instant Age Varnish to give it a lived in earthy feel. The fireplace is wonderful. It is laser cut and then you sand it to round it out like tree branches. I added a paper flooring. Then I painted the exterior using the same technique.
 I finished shaping the foam base....
 ...painted it brown and the glued the house to it.
 Pre-coloured stained glass windows came with the kit which you just have to glue to the frames.


 The last thing I did was add the chimney to the house.
 Now it is time to start with the paper clay. I am only hoping that I can achieve something that looks vaguely like a tree!


 I particularly love the way the grey of the shingles works with the grey floorboards inside. It just looks so wonderful.
 I copied