Showing posts with label Woodland Cabin. Show all posts

Thursday, 24 September 2009

Christmas Fair!

It seems rather early to be thinking about Christmas just yet but I am having to do so this year. I am lucky enough to be sharing a stall at the Craft Candy Christmas fair with my friend Joey from 'Joeys Dream Garden' . The fair will be on Sunday 29th November, in Sheffield at the Workstation. So I have been very busy thinking what to do, I shall try and keep blogging as I make things, to give folk an idea what will be there.

In the meantime I have spent plenty of time on things NOT for the stall but entirely for my own pleasure!!!

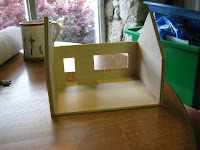
My friend Joey brought me a little shelf, that I think must be for putting decorative thimbles on as the little sections are very small. She thought that I would like it because it has a roof shape - and of course she was right. My two main obsessions at the moment (as previously mentioned) are miniature houses and cupboards - so this was the perfect gift! I immediately starting ripping it to pieces to make the right shapes to fit rooms in.

This is the Cupboard as it was given.

And this is the 1st stage of renovation!

The three middle sections will be the stairwell, then there will be three floors of rooms, with one room on either side of the stairwell and then an attic. It will probably need to be furnished in 144th scale.

Another 144th scale project on the go, is a garden room that I am doing. So far I have only painted the external walls of the garden. I wanted a stucco look to the paintwork and was given several suggestions of ways to do it. I tried a number of different things on practise bits of wood and decided that my favourite was to mix sand in with the paint.
This is a photo of the walls laid flat before building.

To give a sense of scale this piece of wall is about the same size as my thumbnail.
I have also finished the fireplace for the Woodland Cabin, which is in quarter scale. The brickwork is painted onto a plastic sheet that is moulded into brick shape. Then the woodwork I painted with a lighter brown before then dry brushing with a darker shade of brown. The base I painted with several shades of grey to get a stone look.


Now that the fireplace is in I shall put the Cabin to one side for another time to furnish and landscape. As I am wanting to work on my Sea Shanty.

Saturday, 29 August 2009

Busy Day

I decided that a blue wash was definitely what I wanted for my cabin roof so I set too and painted it.


I then shingled the porch roof and painted that too.


Inside I have built and painted both the upstairs bannisters and the ladder. They are not glued in yet because I want to put my furniture in first.


I then went on to build my first 144th scale furniture. Which I have really enjoyed doing. They are quite fiddly but with plenty of advice from Judith I have managed.


I built the Nautical bench first. I shall paint this at a later date. It is sitting on a 20p to give an idea of scale.


I then went on to build the table, this was a bit harder the legs are so skinny and delicate. I stained the pieces with wood stain first. Again I have photographed it next to a 20p.

This is a Tudor Ice Cabinet, which I also stained before building.

And lastly a Tudor chest of drawers. This needs painting and maybe even some drawer handles!!!
I have also been working on the Artist Cabinet for Pickett Hill. Having painted it the other day I have put all the artwork on this afternoon - which, as always with the Betterleys, is just gorgeous!
So a busy miniature building day!!!

Wednesday, 26 August 2009

Cabin Fever

I have been working really hard on the Woodland Cabin these last few weeks. It has taken a lot of jigging about as I am not used to kits that are not laser cut, and this is the first time I have had to cut pieces to fit. Also as it was a class the instructions were not as in depth as I am used to, as a lot was to be done in the classroom, which unfortunately I wasn't able to make it to. But despite these drawbacks (and with a lot of help and advice from Judith as always) I am really pleased with how it is coming out. Here are some photos of how it has been going.

The Cabin fully shingled and trimmed.


The inside of the cabin before decorating.

I decided to use a wood stain on the wooden shingles instead of painting them as I loved the grain so much I didn't want to cover it up. You can also see just a glimpse of the faux wood wallpaper inside. This is the one that came with the kit. Although once I had finished wallpapering I wasn't keen, it didn't seem to sit right with the colour of wood stain that I had chosen for the outside.

Here is the cabin with the roof on and shingled. The chimney attached. The door, window and corner trims have been painted and added. I have built the window and the door frame, but the door itself is a grandt line door.

This is a side view of the cabin showing the chimney and the corner trims.

This shows the inside of the cabin with its new wallpaper and floors. I felt this complimented the colour of the external wood stain better than the original one. The 2nd floor is now in place and the wall divider.

You can see the back of the roof in this photo. I haven't trimmed the shingles yet.

I have built the front porch and painted the parts that I want blue, but it is not yet attached and needs shingling. The porch floor is unstained pine veneer.

And finally a side view of the porch.

I have yet to decide what to use on the roof shingles. I feel that more wood stain might be 'too much' so maybe I will use a blue wash to compliment the paintwork but still show the wood grain. Watch this space !!!!

Saturday, 1 August 2009

Woodland Cabin

The Woodland Cabin is a class that I am taking with The Quarter Connection, which is an online group. We had the choice of either a beach house or a woodland cabin, I chose the woodland option because I am already building the Sea Shanty, which comes on the same type of wharf as the Beach Hut. It is 48th scale and only arrived yesterday morning.

I have to admit I forgot to photograph the cabin at the stage before I started applying the shingles so there is 2 rows of shingles at the bottom!

This is the cabin from the side to give an idea of how deep it is.


And here is the inside of the cabin.

This is the front completely covered in shingles. I will trim the edges and cut out the window and door when the glue is totally dry.

The kit was put together by Luci Hanson from Hanson Minis. It is absolutely lovely. The wood feels really sturdy and the shingles are made from real wood! I can see that I am going to love building this.